iVacation Chronicles, Pt. 4: Text entry
Posted by Pierre Igot in: iPadSeptember 14th, 2010 • 12:39 pm
When we decided to forego the laptop and only take an iPad with us on vacation last month, one of our immediate concerns was what would happen for text entry.
We’re both fast typists who make full use of our hardware keyboards on our respective computers. We are also both bilingual and need to be able to write in both English and French and switch between the two all the time.
On our computers, we both have a keyboard with a French-Canadian layout (called “Canadian French – CSA” in Mac OS X).
One of the benefits of a software keyboard such as the one on the iPad is of course that there is not fixed layout set in hardware, that the keyboard layout can be adjusted via software settings. So you don’t have to worry about ordering an iPad with the right keyboard, since all iPads come with support for international settings and the iOS lets you choose between a variety of keyboard layouts:

But still, one of our concerns was that a software keyboard on the screen wouldn’t be good enough for us while on the road when we really wanted to sit down with the iPad and write longer e-mail messages or other texts.
So we decided to also buy an Apple Wireless Keyboard, which is basically a compact version of the standard aluminium keyboard without the numpad and with Bluetooth connectivity.
It’s actually the standard keyboard that comes even with desktop iMacs these days, although you can customize your order to replace it with a full wired aluminium keyboard with numpad at no extra cost. (The Mac Pro comes standard with an Apple Keyboard with numpad.) I am not sure why Apple is not offering a wireless version of the keyboard with numpad.
Setting up the wireless keyboard to work with the iPad was fairly easy, but even after all these years, I am still a bit wary of wireless devices and especially Bluetooth-based keyboards and mice, because in my experience there are always connectivity problems involving pairing, turning things on and off, and so on.
And indeed one of my immediate concerns with the Apple Wireless Keyboard after setting it up was how to turn the damn thing off. Or how to tell when it is on, for that matter.
According to the manual, it’s dead simple:
The LED on your Apple Wireless Keyboard functions as a battery indicator and a status light. When you first turn on your keyboard, the light glows steadily for 5 seconds, indicating the batteries are good. After 5 seconds, if your keyboard isn’t paired with your Mac, the light begins to blink indicating your keyboard is in discovery mode and ready to pair with your Mac (pairing means your keyboard and Mac are connected wirelessly and ready to communicate with each other).
If you don’t pair your keyboard with your Mac within 3 minutes, the indicator light and keyboard turn off to preserve battery life. Push and release the On/off switch to turn your keyboard on again, allowing you to pair it with your Mac (see page 5).
Once you successfully pair your keyboard with your Mac, the indicator light glows steadily for 3 seconds, and then turns off. If you push the On/off switch and the light doesn’t illuminate, you may need new or charged batteries.
Unfortunately, there is a major flaw in this approach: once the pairing is successful, the light goes off. And then there is no visual indication that the keyboard is on. It looks exactly the same as if it were off.
How is one supposed to know, hours later, whether the keyboard is still on or was turned off, either automatically or manually? I have no idea.
And how do you turn the keyboard off? There’s nothing about that in the manual. All it says is:
To conserve battery power, turn your keyboard off when you aren’t using it.
But how do you do that? As far as I can tell, you need to press and hold the On/off switch until the light goes off. But am I really the only one who finds all this a bit confusing and not very helpful when it comes to determining whether the keyboard is on or off just by looking at it?
The iPad helps in that it automatically pops the software keyboard back up when the connection to the Bluetooth keyboard is lost (if you are in an application that supports text entry), and pops it down when the keyboard is detected. But that’s a rather indirect way of determining the status of your keyboard, and one that requires the iPad to be on and running an appropriate application in the first place. (And I would also argue that there are times when you want both your Bluetooth keyboard and the software keyboard to be available.)
In addition, a few days before leaving, I came across a Macworld article that described how to “Avoid iPad lockouts when using Bluetooth keyboards.” Dan Frakes notes:
As we previously covered, the iPad lets you use a Bluetooth keyboard for extended typing sessions. I’ve been taking advantage of this functionality by frequently leaving my MacBook at home and instead bringing my iPad, a cheap book stand, and Apple’s Wireless Keyboard—a combination that still weighs less than a MacBook Air.
If you’re planning on taking the same approach for some of your travels, and if you’ve enabled a passcode lock on your iPad (which you definitely should if you leave the house with it), let me save you a bit of frustration: Make sure you turn off the Bluetooth keyboard before sticking it in your bag if you want to be able to use your iPad when you reach your destination.
It turns out that, if the keyboard happens to be on, of course keys are going to be pressed accidentally while the keyboard is being carried in a bag. And since the connection with the iPad is “live” whenever they are within range of each other, pressing any key will bring up the passcode screen, and then if numeric keys are pressed, the iPad will misinterpret it as an attempt to enter a passcode. After several unsuccessful such “attempts,” the iPad will go in lockout mode. It’s not exactly helpful when the customs officer asks you to turn the iPad on to show to him that it’s a working unit.
Since it’s hard to tell when the keyboard is on or off, the safest route is to take one of the batteries out, which is what I did while we were in transit.
The reality of our own personal experience with the iPad while in France, however, is that we never took the keyboard out of the bag and turned it on—not even once in over two and a half weeks.
How come? Well, it turns out that neither my wife nor I ever really felt the need for a hardware keyboard. The on-screen software keyboard was adequate to meet our needs.
There were some frustrating aspects, such as the fact that a common symbol such as the apostrophe requires several keystrokes and that accented characters, which are of course heavily used in French, are not as accessible as they are on a hardware keyboard, even with the French Canadian software keyboard.
However, the overall experience of typing with the software keyboard, even in French, was not painful enough to make us want to take the hardware keyboard out. It took me a little while to adjust, but I quickly found that I could be quite an efficient typist by only using one finger on the left hand without moving that left hand much and then several fingers on the right hand. Of course, your own experience will vary depending on your typing habits and skills.
Here’s a web page with a list of tips for speeding up typing on an iPhone or the iPad:
“Keyboard Shortcuts to Speed Up Typing on an iPhone or the iPad”
We discovered most of those tips (as well as a few others) ourselves in the process of using the software keyboard and I must say that, on the whole, the on-screen keyboard, especially in landscape mode, is not too bad at all. (One of the things that the page above doesn’t mention, for example, is that, when you tap and hold a letter to bring up the pop-up list of corresponding accented characters, the keyboard automatically selects the most common accented character for your language, so all you have to do once the pop-up list appears is release the key, and the appropriate accented character is inserted. You don’t actually have to tap on the desired accented character if it’s the one that’s selected by default. Another one is that you don’t need Caps Lock to type a series of letters in uppercase. If you hold the virtual shift key down with one finger, you can type all the uppercase letters you want with your other fingers. The shift key effectively works the same way it wouldn’t on a hardware keyboard.)
What I didn’t discover until after I got home, however, was that even the auto-correct feature has been improved by Apple since the first time I attempted to use it on my iPod touch a couple of years ago. At the time, I found that it only worked in one language (either English or French), which obviously made it useless for a bilingual user who constantly switches from one language to the other. There’s little that is more irritating than an auto-correct feature that persists in wanting to replace the very common French word dont with the English contraction don’t, for example.
But it turns out that, in the current version of the iOS, you can actually have a language-sensitive auto-correct feature. All you have to do is add the two desired keyboards to your settings, under “International Keyboards.” In my case, it the “French (Canada)” keyboard and the “English” keyboard.
Once you have these two keyboards in your settings, the software keyboard that pops up when you need it has a special key with a globe icon:
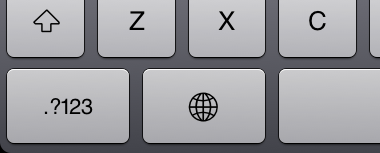
Tapping this key not only switches from one keyboard to the other (the name of the keyboard flashes briefly in the space bar), but also switches the language of the auto-correct feature.
This way, all you have to do when you want to type in one language is choose the desired keyboard, and then the on-screen keyboard will have the required layout, and the auto-correct will correct your text based on its database for the corresponding language.
Since I didn’t know that, I actually turned the auto-correct feature off altogether on the iPad during our trip, so we had to type everything manually, including all the apostrophes and other common things that the auto-correct feature can automatically enter for you.
But even without the auto-correct feature, we still found that the on-screen keyboard was perfectly acceptable for the amount of typing that we needed to do.
Of course, if I had had to do more typing, I might have ended up pulling out that wireless keyboard after all and using it. But for the amount of typing that we ended up doing, the software keyboard was enough, and we could have saved ourselves the trouble of carrying an extra device, however light and compact it is.
Another thing that we didn’t use at all is the small iPad Dock we bought and brought alone, thinking we would have to sit the iPad upright for typing text with our wireless keyboard. I guess the two sort of went together in not being really necessary.
We’ll see if we have more of a use for these two devices now that we are back at home and start using the iPad differently.
One thing that I occasionally thought was missing on the on-screen keyboard for the iPad was cursor keys. Of course, the wireless keyboard does have cursor keys, so I really wanted them I could have switch to that keyboard instead. But I also thought that it might not have been totally useless to include cursor keys in one of the secondary on-screen keyboards accessible through the main one.