Pages ’09: How to centre an inline table
Posted by Pierre Igot in: PagesMarch 30th, 2010 • 11:34 am
This is something that has been bugging me for a long time, and I’ve finally found the answer to my questions. In Pages ’09, you have two kinds of tables: inline tables and floating tables. Floating tables stay in a fixed position on the page and are not tied to the flow of the text. Inline tables move along with the text around them.
By default when you insert a table with the table tool in the toolbar, the inserted table is an inline table. And by default it takes on the alignment of the text before it. In other words, if you were typing left-aligned text when you inserted a table, the table will be left-aligned.
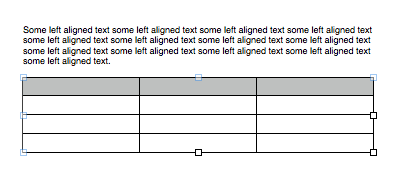
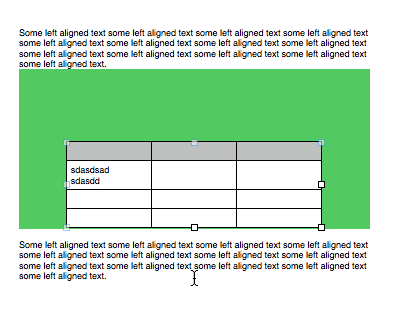
Since the default table inserted by Pages has a total width that equals the width of the text area in which it is inserted, you might not notice that left alignment right away. After all, the table fills the whole width of the text area in the page, so left, right or centre alignment makes no visual difference:
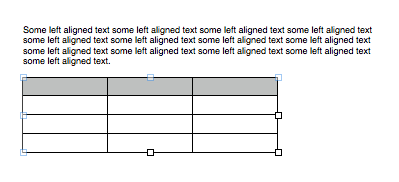
But if you resize the inserted table to make it smaller and it no longer fills the width of the page, you’ll see that it’s left-aligned:
The question then is: How do you make it centred rather than left-aligned?
The answer is not exactly obvious.
There is nothing in the “Table” inspector for aligning the table itself.
If you try to select the table and use the horizontal alignment buttons in the Format Bar, these buttons will affect the horizontal alignment of the text within the selected cells (i.e. all the cells in the table in this case) and not the horizontal alignment of the table itself.
And there does not seem to be a way to place the insertion point just after the table and before the end of the “paragraph” that contains the inline table, because there is no such thing as an invisible paragraph mark at the end of the table. So it does not look like the table itself, even though it is inline and flows with the text, behaves like a paragraph of text, hence the lack of an obvious way to make it centred rather than left-aligned.
The section in the Pages ’09 manual devoted to tables is not helpful either:
To move an inline table, click the table to select it, and then drag it until the insertion point appears where you want the table in the text.
You can also select the table and choose Edit > Cut. Place the insertion point where you want the table to appear, and then choose Edit > Paste.
What appears to work as a hack to centre the inline table is a variation of what is suggested in this second paragraph. You can select the left-aligned inline table:
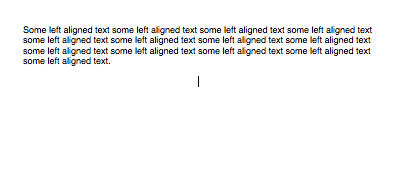
Then you can cut it, which leaves you with just the left-aligned insertion point:

Then you can use the Format Bar to centre your insertion point:
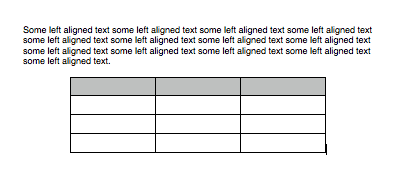
And then you can paste the table:
Not only is the table now centred, but there is also a blinking insertion point at the end of it, where it was previously impossible to select or insert the insertion point! As far as I know, this is the only way to obtain a blinking insertion point in this particular position.
But the whole thing does not seem right. It seems like a hack. And there is actually a “proper” way to do this. The thing you need to know—which is far from obvious—is that the buttons for the horizontal alignment of an inline table are actually located… in the “Wrap” inspector:
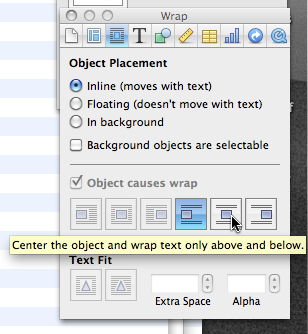
And it turns out that the “hack” described above does seem to be equivalent to using these buttons for inline tables. It is just that having buttons for this is obviously much more intuitive and user-friendly. But it is far from obvious that the buttons for aligning a table are to be found in the “Wrap” inspector!
Yes, it does make sense because the table is indeed an “object” that can be placed/aligned in various ways like other objects in Pages ’09. But if you don’t do much page layout in Pages ’09 and use it mainly as a word processor, you probably don’t spend much time in the “Wrap” inspector. And you don’t necessarily think of going there to change the horizontal alignment of an inline table.
And since the manual itself does not use the word “table” in the section devoted to object alignment and placement, it is not obvious either from reading and searching through the manual for an answer to this particular question of how to align a table.
At least that was the case for me. I am glad that I finally figured it out, and I thought I should mention it if other people end up in the same situation as mine.
Another related question is how to add space before or after an inline table. Here again, the answer is not obvious, and this time I am not sure that there is a solution other than the hack.
If you select the table itself and then try to use the “Before Paragraph” and “After Paragraph” settings in the “Text” inspector, under the “Text” tab, again you will see that these settings affect the formatting of the text within the cells and not of the table itself. (In this particular case, you won’t see any effect unless you have cells containing multiple paragraphs of text, because if a cell only contains a single line or paragraph of text, Pages ’09 “collapses” the space after and before the text, which is superseded by the “Inset Margin” setting in that same “Text” inspector.)
So, is it possible to add space before or after the table itself? As far as I can tell, it is possible, but only if you use the cut-paste hack described above in order to get the blinking insertion point at the end of the table. Once you have that blinking insertion point, you can use the “Before Paragraph” and “After Paragraph” settings in the “Text” inspector, and they will add space before or after the table itself.
Of course, the other way to add space before or after an inline table is to change the “After Paragraph” setting for the paragraph immediately above the table or the “Before Paragraph” setting for the paragraph immediately below. But that to me is not a very elegant solution either, because if you want to change the location of your inline table, the space before or after will not travel with it and you’ll have to manually remove it from those surrounding paragraphs and add it to the new ones.
Be warned, however, that, in order to make sure that the space before or after that you’ve added using the cut-paste hack travels along with the table, you cannot just select the table itself and drag-and-drop it or cut-and-paste it. Instead, you have to double-click on the empty space before or after the table, which causes Pages ’09 to select both the table and the space around it:
Then, and only then, if you drag-and-drop or cut-and-paste the selection, the space before or after associated with the table will travel with it.
Since the other options in the “Wrap” inspector are greyed out when the selected object is an inline table, I don’t see another way to add extra space before or after the table that will travel will it.
The bottom line here is that inline tables seem to be somewhat weird “objects” in Pages ’09 which obey their own rules and rely on an underlying text flow architecture that is only accessible through the cut-and-paste hack.
March 30th, 2010 at Mar 30, 10 | 6:10 pm
[…] Pierre Igot: The bottom line here is that inline tables seem to be somewhat weird “objects” in Pages ’09 which obey their own rules and rely on an underlying text flow architecture that is only accessible through the cut-and-paste hack. […]